Wednesday, May 9, 2012

So Long Digital Cinematography

After a full semester of videos and projects.  Digital Cinematography with Dr. Cranston has come to an end.  Thanks to Josh (Hao Dong) for taking this picture of our class.  I have enjoyed my time in Cinematography class.  Until editing next semester... Its time to relax! To my classmates: Thank you for a great semester of Digital Cinematography!


Jeremy and the Machine

A recent video has just been released of Electronic Music Production artist Jeremy Ellis.  Jeremy uses the Machine Mikro with loaded samples to play beats using his fingertips.  The Machine uses onboard samples that can be loaded up into the hardware, as opposed my MPD 32 which uses samples on a computer and triggers them through the controller (MPD 32).  Essentially this video shows the potential of samples and power of playing beats with fingers.

Online Portfolio

After messing with Weebly and Wix to setup an online portfolio site, I decided to go with Wix.  Wix is a little more user friendly, and has many different templates you can edit.

You can view my Online Portfolio by going to www.wix.com/evanwreser/ereser


Digital Cinematography Production 2

This semester in Digital Cinematography class, we were required to do 10 different lighting setup videos. The following video is lighting setups 6 - 10.  These setups were more difficult than the first five, mostly due to the move requirement as well as shadow detailing importance.

Digital Cinematography Production Stills 2

Here are some stills from the second set of lighting setups that were required for Digital Cinematography. A few of these setups required a move with the camera.   I would like to thank my roommates, James, Josh and Wyeth again for the help they provided me with on these projects.

Tuesday, May 1, 2012

DAMAGE Kontrol by Native Instruments

I was browsing around for the latest and greatest instrument packages from various companies and stumbled across this one.  Its called "DAMAGE" powered by Kontakt; it provides instrument samples from the organic to the mechanic.  This video is the behind the scenes of the creation of Damage.  After watching this video it made me think that this sample/instrument package would be the perfect tool for creating movie scores for your independent films.  
I hope you are as inspired as I am by this video, now its time to go makes some of your own sounds and scores for your independent movies!

Boot Camp Podcast

This podcast interviews Topeka local musician and barista, James Thomblinson. James is currently the mastermind behind the psychedelic experimental music project known as “Mao Bones.” James has played several shows around Topeka and surrounding areas, exploiting his guitar pedals to create a spacey, ambient, yet explosive wall of sound that puts its audience into a state of trance. Mao Bones last played an intimate show at the Blue Planet cafe, where James works as music director and barista.

Wednesday, April 25, 2012

Digital Cinematography Video

As mentioned in my last post, I was assigned 5 various lighting setups to replicate from our textbook.  The video seen here is the video I presented to class.  I also added a photo at the end which you can see what the equipment setup in my garage looked like.  Any critiques would be very much appreciated.

I want to thank my roommate Wyeth and Josh for their help on my final video.

Digital Cinematography Lighting Setups 1-5 from Evan Reser on Vimeo.

Digital Cinematography Production Stills

Since this blog is called AV wonderland, for Audio AND Video, I figured I would share some screen shots from a recent digital cinematography project.  The assignment was to replicate 5 various assigned lighting setups in video.  The following slideshow are stills from production.  I would also like to thank my friends James and Kyle for helping me out with this project.

Thursday, April 12, 2012

Re-Wire from Reason to Ableton

One of the very first questions I asked when I started working with Ableton Live and Reason was "How do I route (Re-wire) the Reason Instruments into Ableton?" After a little bit of trial and error, I finally figured out a way to Re-Wire Reason into Ableton. I have created a video tutorial to help guide you through the setup. The basic Steps are as follows...


1. You first need to open up Ableton Live (Important Ableton is First)
2. Next, open up Reason
3. Start a new Project by going File>New (Close demo)
4. Delete any default mixing/instrument devices (Leave Re-Wire Device [top])
5. Right Click and create your desired sound/instrument.
6. Go into Ableton and find where it says "Ext. In" under the Audio Track and select "Reason"
7. Under the MIDI track change the "MIDI To" selection to "Reason"
8. Below "MIDI To" another drop down box will appear change "Hardware" to "Desired Instrument"
9. Make sure the Input on the MIDI track shows "1/2" (Channels 1 & 2, 3 & 4, etc.)
10. Always make sure "MIDI" and "Audio" Tracks both are selected "IN"
11. Finally, trigger your controller or keyboard to make sure the signal and audio is coming through. You can now start recording your instrument from Reason in Ableton Live.


Monday, March 12, 2012

Instrument Heaven

Whenever I'm interested in a new piece of music equipment and want to get a hands on experience with it before I buy, I usually check out Mass Street Music in Lawrence. Mass Street music has a good selection of guitars, acoustic, and electric, as well as drums, electronic kits, keyboards, and audio equipment.


View Larger Map

Thursday, February 23, 2012

What exactly is Ableton Live?

There are a lot of videos out there on Ableton live. However, no video explains what Ableton Live is, and can do as well as this one. This comes directly from Ableton Live's Dennis DeSantis.
As you can see from this video, DeSantis goes through a plethora of information on what exactly the possibilities are when working in Ableton. I was really pleased to see that he is working with a Novation Remote, as well as a APC40. He uses the Novation to "trigger" the keys to input the MIDI data, and moves over to the APC40 to tweak the data (knobs), to change the value of the multiple variables within the MIDI data.
The video also features DJ Jazzy Jeff and other producers and their take on Ableton Live.


Wednesday, February 22, 2012

Photography Fun

In the past few weeks, I have been working with a CanonT3i for my Digital Cinematography class. We are working with exposure, color temperature, depth of field, and the grey scale zone system. We are also working with light set-ups and light ratios.

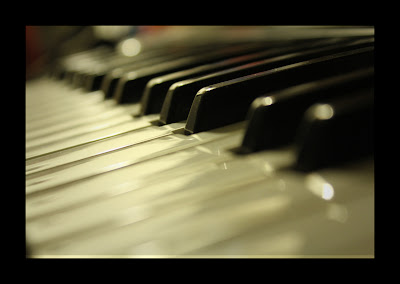
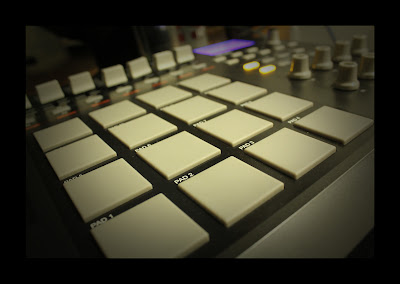
I had the opportunity to take a few pictures of the music equipment I have mentioned in my previous post...


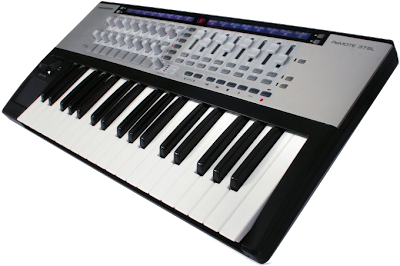
The ReMOTE 37 SL
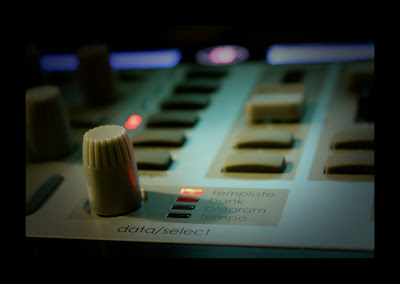


Akai MPD 32


Thursday, February 2, 2012

Introduction

Hello, blog-o-sphere. First let me start by mentioning this blog is
an ongoing project for my Mass Media Boot Camp class.


The Following is some of the equipment I use, and will be blogging about.

MPD-32
8 Knobs 8 faders and 16 velocity Pads.
Auto mapping and Manual mapping available for a wide array of programs..
Used for on the fly mixing, as well as a drum machine,
h
owever there is no on board synth's on this.
MIDI/USB controller only.


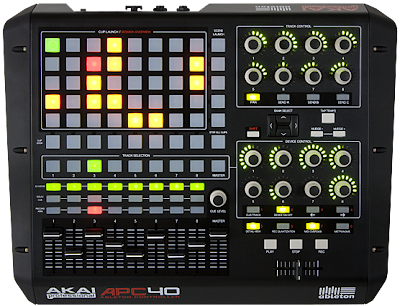
APC-40
Also made by Akai, the APC is used to control samples from your session
view in Ableton Live. It also comes with faders and knobs for auto or manual mapping. DJ's tend to find this one of the most helpful tools for them while working in Ableton Live.


Novation 37sl
This is a USB/Midi Keybaord that is used to create MIDI data that can be manipulated in any music recording software such as Ableton Live, Reason, Cuebase, etc...


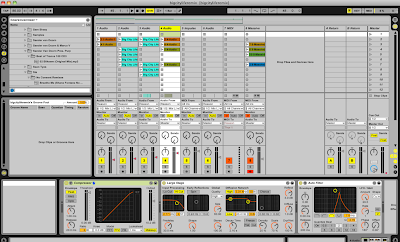
Ableton Live
There is a lot you can do with Ableton Live, Music Recording, Live Mixing,
DJing, VDJing, Loop station, Synths. Here is an example of what
one of my
session views looks like in Ableton...


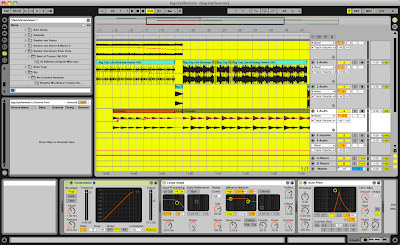
This is what the Timeline View looks like. This view is used more for composing your songs.


These are just a few pieces of hardware that make up my homemade studio, using Ableton Live as my base music software. In the future I will also dive into Reason, as well as making a tutorial on how to set up Reason Re-Wire in Ableton Live.